nunim
VPS Junkie
This is a simple tutorial to show you how to setup 2 factor authentication on your VPS with the Google-authenticator app for Android, iOS & FireFox Addon
Easy Install Script - Debian/Ubuntu
wget www.sonicboxes.com/nx/googleauth.sh
chmod 755 googleauth.sh
./googleauth.sh
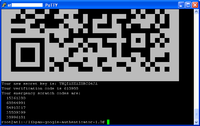
You're all done, just add the secret key to your google-authenticator app/plugin, or scan the QR code and you're ready to go Make sure you save your one-time scratch codes in a safe place!
Compiling from Source:
1. Get the dependencies required to build
Debian/Ubuntu
apt-get install libpam0g-dev libqrencode3 wget make
CentOS
yum install gcc gcc++ make python python-devel pam-devel
2. Download the source and extract
wget https://google-authenticator.googlecode.com/files/libpam-google-authenticator-1.0-source.tar.bz2
tar -xqf libpam-google-authenticator-1.0-source.tar.bz2
cd libpam-google-authenticator-1.0
3. Build Google-Authenticator
make
make install
4. Edit sshd_config to allow ChallengeResponse
nano /etc/ssh/sshd_config
Find ChallengeResponseAuthentication in the config, ensure the line is uncommented and set to "yes"
Should look like this:
...
# Change to yes to enable challenge-response passwords (beware issues with
# some PAM modules and threads)
ChallengeResponseAuthentication yes
...
5. Next we want to add the google-authenticator to our pam modules
sed -i '1i\auth required pam_google_authenticator.so' /etc/pam.d/sshd
6. Restart SSH Daemon
/etc/init.d/sshd restart
7. Install the Google-Authenticator App
Android
iOS
FireFox Addon
8. Run Google-Authenticator
google-authenticator -tfd -r 3 -R 30 -w 17
This will generate your secret key with default values. Print, write down, save, somehow preserve your scratch codes and secret key as without these you will not be able to login to your SSH server without your google-autheticator app.

9. Scan the QR provided to automatically add the key to your phone, or manually add your SECRET key to the application. Don't see a QR code? Enter the google link from the output into your web browser and Google will generate the QR code for you.


10. Launch a new SSH session
Keep your old session open just incase you screwed up something prior to this point and you are not able to access your server. Enter your username as normal, when asked for the verification code enter the code shown on your google-authenticator app, do it quickly as the codes are only good for 30 seconds. Then enter your password as normal and you should be logged into your SSH server. Congrats!

If you ever want to change your secret code, generator new one time scratch codes or add another user to google-authenticator, just run the google-autheticator command (step 8) again and it will output new values.
Easy Install Script - Debian/Ubuntu
wget www.sonicboxes.com/nx/googleauth.sh
chmod 755 googleauth.sh
./googleauth.sh
You're all done, just add the secret key to your google-authenticator app/plugin, or scan the QR code and you're ready to go
Compiling from Source:
1. Get the dependencies required to build
Debian/Ubuntu
apt-get install libpam0g-dev libqrencode3 wget make
CentOS
yum install gcc gcc++ make python python-devel pam-devel
2. Download the source and extract
wget https://google-authenticator.googlecode.com/files/libpam-google-authenticator-1.0-source.tar.bz2
tar -xqf libpam-google-authenticator-1.0-source.tar.bz2
cd libpam-google-authenticator-1.0
3. Build Google-Authenticator
make
make install
4. Edit sshd_config to allow ChallengeResponse
nano /etc/ssh/sshd_config
Find ChallengeResponseAuthentication in the config, ensure the line is uncommented and set to "yes"
Should look like this:
...
# Change to yes to enable challenge-response passwords (beware issues with
# some PAM modules and threads)
ChallengeResponseAuthentication yes
...
5. Next we want to add the google-authenticator to our pam modules
sed -i '1i\auth required pam_google_authenticator.so' /etc/pam.d/sshd
6. Restart SSH Daemon
/etc/init.d/sshd restart
7. Install the Google-Authenticator App
Android
iOS
FireFox Addon
8. Run Google-Authenticator
google-authenticator -tfd -r 3 -R 30 -w 17
This will generate your secret key with default values. Print, write down, save, somehow preserve your scratch codes and secret key as without these you will not be able to login to your SSH server without your google-autheticator app.

9. Scan the QR provided to automatically add the key to your phone, or manually add your SECRET key to the application. Don't see a QR code? Enter the google link from the output into your web browser and Google will generate the QR code for you.


10. Launch a new SSH session
Keep your old session open just incase you screwed up something prior to this point and you are not able to access your server. Enter your username as normal, when asked for the verification code enter the code shown on your google-authenticator app, do it quickly as the codes are only good for 30 seconds. Then enter your password as normal and you should be logged into your SSH server. Congrats!

If you ever want to change your secret code, generator new one time scratch codes or add another user to google-authenticator, just run the google-autheticator command (step 8) again and it will output new values.
Last edited by a moderator:
