wlanboy
Content Contributer
VestaCP is a free and open source contol panel.
I am running two instances for about three months and have to admit that I do like it more than zpanel.
The basic configuration is solid and the integration of:
Installation is done by following two commands:
curl -O http://vestacp.com/pub/vst-install.sh
sudo bash vst-install.sh
Enter a valid email address where the login information is sent to.
The welcome email looks like this:
Congratulations, you have just successfully installed the Vesta Control Panel
You can login in Vesta with following credentials:
username: admin
password: ***************
https://ip-address:8083
We hope that you enjoy your installation of Vesta. Please feel free to contact us anytime if you have any questions.
Thank you.
--
Sincerely yours
vestacp.com team
Things I changed:
1. Add SSL support for mail server:
nano nano /etc/exim4/exim4.conf.template
Uncomment following lines:
# tls_advertise_hosts = *
# tls_certificate = /usr/local/vesta/ssl/certificate.crt
# tls_privatekey = /usr/local/vesta/ssl/certificate.key
You should replace the generated certs with your own.
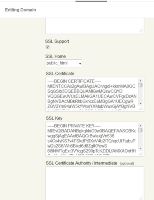
The SSL certs for web can be entered through the web frontend.
2. Add secondary DNS servers
The dns zone files are located at:
/home/[user]/conf/dns/[domainname].db
If you look to the bind config:
cat /etc/bind/named.conf
Content:
// This is the primary configuration file for the BIND DNS server named.
//
// Please read /usr/share/doc/bind9/README.Debian.gz for information on the
// structure of BIND configuration files in Debian, *BEFORE* you customize
// this configuration file.
//
// If you are just adding zones, please do that in /etc/bind/named.conf.local
include "/etc/bind/named.conf.options";
include "/etc/bind/named.conf.local";
include "/etc/bind/named.conf.default-zones";
zone "domain.com" {type master; file "/home/admin/conf/dns/domain.com.db";};
The zone files themselfs are allready defined as master!
So we only have to definde the options:
nano /etc/bind/named.conf.options
And add:
options {
allow-transfer { [ip-address of slave]; };
notify yes;
};
On the secondary dns servers we just have to add the zones to the named.conf:
nano /etc/bind/named.conf
Add:
zone "domain.com" {
type slave;
masters { [ip of vestacp server]; };
file "domain.com.db";
};
Done.
As I said - everything prepared and well performed.
Really enjoying my VerstaCP time.
I am running two instances for about three months and have to admit that I do like it more than zpanel.
The basic configuration is solid and the integration of:
- Nginx
- SSL
- SPF and DKIM
- AntiSpam / Antivirus
- Backups
Installation is done by following two commands:
curl -O http://vestacp.com/pub/vst-install.sh
sudo bash vst-install.sh
Enter a valid email address where the login information is sent to.
The welcome email looks like this:
Congratulations, you have just successfully installed the Vesta Control Panel
You can login in Vesta with following credentials:
username: admin
password: ***************
https://ip-address:8083
We hope that you enjoy your installation of Vesta. Please feel free to contact us anytime if you have any questions.
Thank you.
--
Sincerely yours
vestacp.com team
Things I changed:
1. Add SSL support for mail server:
nano nano /etc/exim4/exim4.conf.template
Uncomment following lines:
# tls_advertise_hosts = *
# tls_certificate = /usr/local/vesta/ssl/certificate.crt
# tls_privatekey = /usr/local/vesta/ssl/certificate.key
You should replace the generated certs with your own.
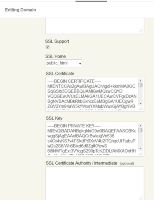
The SSL certs for web can be entered through the web frontend.
2. Add secondary DNS servers
The dns zone files are located at:
/home/[user]/conf/dns/[domainname].db
If you look to the bind config:
cat /etc/bind/named.conf
Content:
// This is the primary configuration file for the BIND DNS server named.
//
// Please read /usr/share/doc/bind9/README.Debian.gz for information on the
// structure of BIND configuration files in Debian, *BEFORE* you customize
// this configuration file.
//
// If you are just adding zones, please do that in /etc/bind/named.conf.local
include "/etc/bind/named.conf.options";
include "/etc/bind/named.conf.local";
include "/etc/bind/named.conf.default-zones";
zone "domain.com" {type master; file "/home/admin/conf/dns/domain.com.db";};
The zone files themselfs are allready defined as master!
So we only have to definde the options:
nano /etc/bind/named.conf.options
And add:
options {
allow-transfer { [ip-address of slave]; };
notify yes;
};
On the secondary dns servers we just have to add the zones to the named.conf:
nano /etc/bind/named.conf
Add:
zone "domain.com" {
type slave;
masters { [ip of vestacp server]; };
file "domain.com.db";
};
Done.
As I said - everything prepared and well performed.
Really enjoying my VerstaCP time.


