wlanboy
Content Contributer
My first touch with BSD was a shell account on FreeBSD 4.2. 13 years later (ouch I am old) FreeBSD shines on version 9.2.
If you have a dev box (KVM) which is idling take it and install FeeBSD on it.
It is Unix but it does not bite if you know how to handle everything.
If your start your KVM the little devil boy is greeting you:

I will not show every single step (e.g. network with dhcp auto config is boring) but I want to show how easy it is to install FeeBSD.
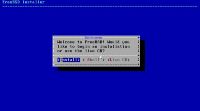
No live system - we want to install that thing.
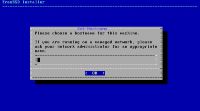
Name the machine (a fqn would be nice)
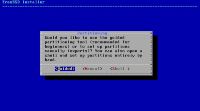
It is a KVM, so just go the guided way for the full hd.
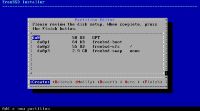
Just select every package.
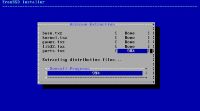
And a root password.

And a user too - if you want.
And your network config.
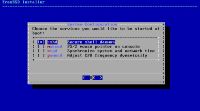
SSH server would be nice.
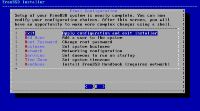
Exit to save your config.

And done.
How do I update the system?
freebsd-update fetch
freebsd-update install
Heck nothing is working and I am not able to connect to my vps!
Yup your system is running but it is running as designed -> Save.
So your ssh daemon is only listeing on localhost.
Next thing is the update of your ports:
portsnap fetch
portsnap extract
portsnap update
What are ports?
The FreeBSD ports collection offers a simple way to install applications. There are currently over 20000 ports available.
It is a list of make files and package dependencies. You can go into one folder and make your tool of choice right out of the source code.
Let's start with nano:
cd /usr/ports/editors/nano
make install clean
This will compile and install "nano" to your system.
You should run following command at the end:
ln -s /usr/local/bin/nano /usr/bin/nano
Why?
Because BSD is separating the operating system from the services.
SSH is part of the system so it's config is in: /etc/ssh/...
Lighttpd is a service so it's config is in: /usr/local/etc/lighttpd/...
A nice separation of concerns.
For nano a "hand made" compile does not make a lot of sense. So there are binary packages too:
pkg_add -r -v nano
This will install nano too. But without the console cinema of the gnu compiler.
So how should you install things?
Depends on what you want to do. If you want to tweak or enable some flags you should use ports. You can even edit the source code too.
Lighttpd is a good example. I used ports to install lighttpd because of the compiler flags you can set.
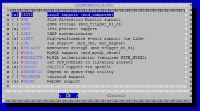
Same with php, sqlite, etc.
You can start lighttpd with following command:
/usr/local/etc/rc.d/lighttpd restart
Output is:
Cannot 'restart' lighttpd.
Set lighttpd_enable to YES in /etc/rc.conf or use 'onerestart' instead of 'restart'.
So we have to enable lighttpd in rc.conf to be a valid service:
echo 'lighttpd_enable="YES"' >> /etc/rc.conf
Fastest way:
pkg_add -r -v lighttpd
So back to some basic tools if FreeBSD:
pkg_add -r -v bash
pkg_add -r -v nano
pkg_add -r -v lynx
To get some basic Debian feeling back.
There is no "free" but "vmstat" does the job too:
vmstat
procs memory page disks faults cpu
r b w avm fre flt re pi po fr sr vt0 cd0 in sy cs us sy id
0 0 0 386M 1256M 25 0 0 0 26 0 0 0 3 103 160 0 0 100
Same with netstat -taupen - unkown parameters. So use netstat -an | egrep 'LISTEN' instead:
netstat -an | egrep 'Proto|LISTEN'
netstat: kvm not available: /dev/mem: No such file or directory
Proto Recv-Q Send-Q Local Address Foreign Address (state)
tcp4 0 0 10.10.10.10.80 *.* LISTEN
tcp4 0 0 10.10.10.10.25 *.* LISTEN
tcp4 0 0 10.10.10.10.22 *.* LISTEN
But back to topic. If you want to run some of your loved tools google for it. FreeBSD does have a Linux support layer too. So every Linux tool can be run under FreeBSD too.
We now want to install ezjail.
cd /usr/ports/sysutils/ezjail
make install clean
echo 'ezjail_enable="YES"' >> /etc/rc.conf
ezjail-admin install
Last command will "generate the world" it fetches everything needed to setup an ezjail environment (a FreeBSD inside of FreeBSD).
Now we add a new interface to our box by editing the /etc/rc.conf:
gateway_enable="YES"
cloned_interfaces="lo10"
ifconfig_lo10_alias0="inet 10.10.10.1 netmask 255.255.255.0"
ifconfig_lo10_alias1="inet 10.10.10.10 netmask 255.255.255.0"
First line will enable the ip forwarding.
Second line creates a new loopback device.
The last two lines add IP addresses to the interface.
I don't want to give the jails access to the localhost interface or any public ip. I want to decide which connection to a jail is allowed. So this is the best way to separate the networks.
The alias1 will be used for my first jail. Jails can only use ips that are allready in use by the host system.
So time for a reboot.
shutdown -r now
Ok at least this is like a Debian system ;-)
So lets install a jail:
ezjail-admin create -r /jails/webjail webjail 10.10.10.10
Folder for the jail filesystem name and first ip address.
You can edit the configuration with following command (reminder "webjail" is the name of the jail)
nano /usr/local/etc/ezjail/web
Conent is:
# To specify the start up order of your ezjails, use these lines to
# create a Jail dependency tree. See rcorder(8) for more details.
#
# PROVIDE: standard_ezjail
# REQUIRE:
# BEFORE:
#
export jail_web_hostname="webjail"
export jail_web_ip="10.10.10.10"
export jail_web_rootdir="/jails/webjail"
export jail_web_exec_start="/bin/sh /etc/rc"
export jail_web_exec_stop=""
export jail_web_mount_enable="YES"
export jail_web_devfs_enable="YES"
export jail_web_devfs_ruleset="devfsrules_jail"
export jail_web_procfs_enable="YES"
export jail_web_fdescfs_enable="YES"
export jail_web_image=""
export jail_web_imagetype=""
export jail_web_attachparams=""
export jail_web_attachblocking=""
export jail_web_forceblocking=""
export jail_web_zfs_datasets=""
export jail_web_cpuset=""
export jail_web_fib=""
export jail_web_parentzfs=""
export jail_web_parameters=""
export jail_web_post_start_script=""
The jail itself (because we are not using any template) is missing some files:
1. DNS config:
cp /etc/resolve.conf /jails/webjail/etc/
2. rc.conf
echo 'sshd_enable="YES"' >> /jails/webjail/etc/rc.conf
3. Edit sshd config to listen to 10.10.10.10
nano /jails/webjail/etc/ssh/sshd_config
And add the line:
ListenAddress 10.10.10.10
We are now able to see our jail with jls:
jls -v
JID Hostname Path
Name State
CPUSetID
IP Address(es)
2 web /jails/web
web ACTIVE
2
10.10.10.10
We can now start and stop the jail:
ezjail-admin start webjail
ezjail-admin stop webjail
And enter the jail too:
ezjail-admin console webjail
But the jail itself will not have any internet access.
This can be done by pf:
We have to enable pf and set some parameters in /etc/rc.conf:
pf_enable="YES"
pf_rules="/etc/pf.conf"
pflog_logfile="/var/log/pflog"
pf_flags=""
And of course set the pf rules in /etc/pf.conf:
external_if="vtnet0"
jail_if="lo10"
IP_PUBLIC="my real ip"
IP_JAIL_WWW="10.10.10.10"
NET_JAIL="10.10.10.0/24"
PORT_WWW="{80,443}"
scrub in all
# nat jail traffic
nat pass on $external_if from $NET_JAIL to any -> $IP_PUBLIC
# web forward
rdr pass on $external_if proto tcp from any to $IP_PUBLIC port $PORT_WWW -> $IP_JAIL_WWW
# demo only, passing all traffic
pass out
pass in
Yup I like the syntax of pf.
I am inside of a KVM so "vtnet0" is my "em0" or "eth0" - the one with the internet connection.
Well it just nats everything from the jail network to the real internet and allows the jail to serve the port 80 and 443.
Inside of the jail I run:
pkg_add -r -v bash nano lighttpd
echo 'lighttpd_enable="YES"' >> /etc/rc.conf
mkdir /usr/local/www/data
/usr/local/etc/rc.d/lighttpd restart
Now (don't forget to restart) I am able to put stuff in /usr/local/www/data that will be served by lighttpd running inside of the jail.
Next topic is about running fail2ban.
You should install fail2ban and configure it to use pf.
1. Add "ban" table to pf
nano /etc/pf.conf
Add following line
ipfw add deny all from 'table(1)' to any dst-port 22 in
2. Install fail2ban
cd /usr/ports/security/py-fail2ban
make install
And enable it to autostart:
nano /etc/rc.conf
Add following line
fail2ban_enable="YES"
3. Add ssh check to fail2ban configuration
nano /usr/local/etc/fail2ban/jail.conf
Add following lines:
[ssh-ipfw]
enabled = true
filter = sshd
action = ipfw-ssh
logpath = /var/log/sshd/current
maxretry = 3
Change to following directory:
cd /usr/local/etc/fail2ban/action.d
Copy default pf config:
cp ipfw.conf ipfw-ssh.conf
Change two lines on the new file.
nano ipfw-ssh.conf
Content:
old:
actionban = ipfw add <blocktype> tcp from <ip> to <localhost> <port>
actionunban = ipfw delete `ipfw list | grep -i <ip> | awk '{print $1;}'`
new:
actionban = ipfw table 1 add <ip>
actionunban = ipfw table 1 delete <ip>
Done.
Now fail2ban is checking the ssh service for failed logins.
Next topic is about running an OpenVPN server.
1. Install openvpn
cd /usr/ports/security/openvpn && make install clean
mkdir /usr/local/etc/openvpn && /usr/local/etc/openvpn
2. Enable openvpn
echo 'openvpn_enable="YES"' >> /etc/rc.conf
echo 'openvpn_configfile="/usr/local/etc/openvpn/server.conf"' >> /etc/rc.conf
echo 'openvpn_if="tun"' >> /etc/rc.conf
3. Manage ssl certs with ssl-admin
cd /usr/ports/security/ssl-admin && make install
cp /usr/local/etc/ssl-admin/ssl-admin.conf.default /usr/local/etc/ssl-admin/ssl-admin.conf
nano /usr/local/etc/ssl-admin/ssl-admin.conf
And add the information missing (state, country, city, org, ...)
And start ssl-admin
ssl-admin
=====================================================
# SSL-ADMIN #
=====================================================
Please enter the menu option from the following list:
1) Update run-time options:
Key Duration (days): 3650
Current Serial #: 04
Key Size (bits): 2048
Intermediate CA Signing: NO
2) Create new Certificate Request
3) Sign a Certificate Request
4) Perform a one-step request/sign
5) Revoke a Certificate
6) Renew/Re-sign a past Certificate Request
7) View current Certificate Revokation List
8) View index information for certificate.
i) Generate a user config with in-line certifcates and keys.
z) Zip files for end user.
dh) Generate Diffie Hellman parameters.
CA) Create new Self-Signed CA certificate.
S) Create new Signed Server certificate.
q) Quit ssl-admin
3a) Create server cert
Press "S" and enter information
3b) Create client certs
Press "4" and enter information
Check all issued certs:
ls -al /usr/local/etc/ssl-admin/active
Copy certs to openssl directory
cd /usr/local/etc/ssl-admin/active && cp ca.crt server.crt server.key /usr/local/etc/openvpn && cd /usr/local/etc/openvpn
3c) Create dh:
openssl dhparam -out /usr/local/etc/openvpn/dh2048.pem 2048
4. Create openvpn configuration:
nano /usr/local/etc/openvpn/server.conf
Content:
daemon
port 4444
proto udp
dev tun
server [YOUR-OPENVPN-SUBNET] 255.255.255.0
ca /usr/local/etc/openvpn/ca.crt
cert /usr/local/etc/openvpn/server.crt
key /usr/local/etc/openvpn/server.key
dh /usr/local/etc/openvpn/dh2048.pem
client-to-client
duplicate-cn
keepalive 10 120
user nobody
group nogroup
persist-key
persist-tun
ifconfig-pool-persist ipp.txt
comp-lzo
client-to-client
max-clients 3
push "redirect-gateway def1 bypass-dhcp"
status /usr/local/etc/openvpn/openvpn-status.log
log-append /usr/local/etc/openvpn/openvpn.log
verb 4
5. Start openvpn
/usr/local/etc/rc.d/openvpn restart
Your OpenVPN server is running.
PS: I really like ssl-admin
That's it. A first look into the world of FreeBSD.
Hopefully I draw your interest. FreeBSD is woth it.
Next topic will be a ipv6 tunnel and how the jails can have access to it.
If you have a dev box (KVM) which is idling take it and install FeeBSD on it.
It is Unix but it does not bite if you know how to handle everything.
If your start your KVM the little devil boy is greeting you:

I will not show every single step (e.g. network with dhcp auto config is boring) but I want to show how easy it is to install FeeBSD.

No live system - we want to install that thing.

Name the machine (a fqn would be nice)

It is a KVM, so just go the guided way for the full hd.

Just select every package.

And a root password.

And a user too - if you want.
And your network config.

SSH server would be nice.

Exit to save your config.

And done.
How do I update the system?
freebsd-update fetch
freebsd-update install
Heck nothing is working and I am not able to connect to my vps!
Yup your system is running but it is running as designed -> Save.
So your ssh daemon is only listeing on localhost.
Next thing is the update of your ports:
portsnap fetch
portsnap extract
portsnap update
What are ports?
The FreeBSD ports collection offers a simple way to install applications. There are currently over 20000 ports available.
It is a list of make files and package dependencies. You can go into one folder and make your tool of choice right out of the source code.
Let's start with nano:
cd /usr/ports/editors/nano
make install clean
This will compile and install "nano" to your system.
You should run following command at the end:
ln -s /usr/local/bin/nano /usr/bin/nano
Why?
Because BSD is separating the operating system from the services.
SSH is part of the system so it's config is in: /etc/ssh/...
Lighttpd is a service so it's config is in: /usr/local/etc/lighttpd/...
A nice separation of concerns.
For nano a "hand made" compile does not make a lot of sense. So there are binary packages too:
pkg_add -r -v nano
This will install nano too. But without the console cinema of the gnu compiler.
So how should you install things?
Depends on what you want to do. If you want to tweak or enable some flags you should use ports. You can even edit the source code too.
Lighttpd is a good example. I used ports to install lighttpd because of the compiler flags you can set.

Same with php, sqlite, etc.
You can start lighttpd with following command:
/usr/local/etc/rc.d/lighttpd restart
Output is:
Cannot 'restart' lighttpd.
Set lighttpd_enable to YES in /etc/rc.conf or use 'onerestart' instead of 'restart'.
So we have to enable lighttpd in rc.conf to be a valid service:
echo 'lighttpd_enable="YES"' >> /etc/rc.conf
Code:
/usr/local/etc/rc.d/lighttpd restart
Performing sanity check on lighttpd configuration:
Syntax OK
Stopping lighttpd.
Waiting for PIDS: 10229.
Starting lighttpd.pkg_add -r -v lighttpd
So back to some basic tools if FreeBSD:
pkg_add -r -v bash
pkg_add -r -v nano
pkg_add -r -v lynx
To get some basic Debian feeling back.
There is no "free" but "vmstat" does the job too:
vmstat
procs memory page disks faults cpu
r b w avm fre flt re pi po fr sr vt0 cd0 in sy cs us sy id
0 0 0 386M 1256M 25 0 0 0 26 0 0 0 3 103 160 0 0 100
Same with netstat -taupen - unkown parameters. So use netstat -an | egrep 'LISTEN' instead:
netstat -an | egrep 'Proto|LISTEN'
netstat: kvm not available: /dev/mem: No such file or directory
Proto Recv-Q Send-Q Local Address Foreign Address (state)
tcp4 0 0 10.10.10.10.80 *.* LISTEN
tcp4 0 0 10.10.10.10.25 *.* LISTEN
tcp4 0 0 10.10.10.10.22 *.* LISTEN
But back to topic. If you want to run some of your loved tools google for it. FreeBSD does have a Linux support layer too. So every Linux tool can be run under FreeBSD too.
We now want to install ezjail.
cd /usr/ports/sysutils/ezjail
make install clean
echo 'ezjail_enable="YES"' >> /etc/rc.conf
ezjail-admin install
Last command will "generate the world" it fetches everything needed to setup an ezjail environment (a FreeBSD inside of FreeBSD).
Now we add a new interface to our box by editing the /etc/rc.conf:
gateway_enable="YES"
cloned_interfaces="lo10"
ifconfig_lo10_alias0="inet 10.10.10.1 netmask 255.255.255.0"
ifconfig_lo10_alias1="inet 10.10.10.10 netmask 255.255.255.0"
First line will enable the ip forwarding.
Second line creates a new loopback device.
The last two lines add IP addresses to the interface.
I don't want to give the jails access to the localhost interface or any public ip. I want to decide which connection to a jail is allowed. So this is the best way to separate the networks.
The alias1 will be used for my first jail. Jails can only use ips that are allready in use by the host system.
So time for a reboot.
shutdown -r now
Ok at least this is like a Debian system ;-)
So lets install a jail:
ezjail-admin create -r /jails/webjail webjail 10.10.10.10
Folder for the jail filesystem name and first ip address.
You can edit the configuration with following command (reminder "webjail" is the name of the jail)
nano /usr/local/etc/ezjail/web
Conent is:
# To specify the start up order of your ezjails, use these lines to
# create a Jail dependency tree. See rcorder(8) for more details.
#
# PROVIDE: standard_ezjail
# REQUIRE:
# BEFORE:
#
export jail_web_hostname="webjail"
export jail_web_ip="10.10.10.10"
export jail_web_rootdir="/jails/webjail"
export jail_web_exec_start="/bin/sh /etc/rc"
export jail_web_exec_stop=""
export jail_web_mount_enable="YES"
export jail_web_devfs_enable="YES"
export jail_web_devfs_ruleset="devfsrules_jail"
export jail_web_procfs_enable="YES"
export jail_web_fdescfs_enable="YES"
export jail_web_image=""
export jail_web_imagetype=""
export jail_web_attachparams=""
export jail_web_attachblocking=""
export jail_web_forceblocking=""
export jail_web_zfs_datasets=""
export jail_web_cpuset=""
export jail_web_fib=""
export jail_web_parentzfs=""
export jail_web_parameters=""
export jail_web_post_start_script=""
The jail itself (because we are not using any template) is missing some files:
1. DNS config:
cp /etc/resolve.conf /jails/webjail/etc/
2. rc.conf
echo 'sshd_enable="YES"' >> /jails/webjail/etc/rc.conf
3. Edit sshd config to listen to 10.10.10.10
nano /jails/webjail/etc/ssh/sshd_config
And add the line:
ListenAddress 10.10.10.10
We are now able to see our jail with jls:
jls -v
JID Hostname Path
Name State
CPUSetID
IP Address(es)
2 web /jails/web
web ACTIVE
2
10.10.10.10
We can now start and stop the jail:
ezjail-admin start webjail
ezjail-admin stop webjail
And enter the jail too:
ezjail-admin console webjail
But the jail itself will not have any internet access.
This can be done by pf:
We have to enable pf and set some parameters in /etc/rc.conf:
pf_enable="YES"
pf_rules="/etc/pf.conf"
pflog_logfile="/var/log/pflog"
pf_flags=""
And of course set the pf rules in /etc/pf.conf:
external_if="vtnet0"
jail_if="lo10"
IP_PUBLIC="my real ip"
IP_JAIL_WWW="10.10.10.10"
NET_JAIL="10.10.10.0/24"
PORT_WWW="{80,443}"
scrub in all
# nat jail traffic
nat pass on $external_if from $NET_JAIL to any -> $IP_PUBLIC
# web forward
rdr pass on $external_if proto tcp from any to $IP_PUBLIC port $PORT_WWW -> $IP_JAIL_WWW
# demo only, passing all traffic
pass out
pass in
Yup I like the syntax of pf.
I am inside of a KVM so "vtnet0" is my "em0" or "eth0" - the one with the internet connection.
Well it just nats everything from the jail network to the real internet and allows the jail to serve the port 80 and 443.
Inside of the jail I run:
pkg_add -r -v bash nano lighttpd
echo 'lighttpd_enable="YES"' >> /etc/rc.conf
mkdir /usr/local/www/data
/usr/local/etc/rc.d/lighttpd restart
Now (don't forget to restart) I am able to put stuff in /usr/local/www/data that will be served by lighttpd running inside of the jail.
Next topic is about running fail2ban.
You should install fail2ban and configure it to use pf.
1. Add "ban" table to pf
nano /etc/pf.conf
Add following line
ipfw add deny all from 'table(1)' to any dst-port 22 in
2. Install fail2ban
cd /usr/ports/security/py-fail2ban
make install
And enable it to autostart:
nano /etc/rc.conf
Add following line
fail2ban_enable="YES"
3. Add ssh check to fail2ban configuration
nano /usr/local/etc/fail2ban/jail.conf
Add following lines:
[ssh-ipfw]
enabled = true
filter = sshd
action = ipfw-ssh
logpath = /var/log/sshd/current
maxretry = 3
Change to following directory:
cd /usr/local/etc/fail2ban/action.d
Copy default pf config:
cp ipfw.conf ipfw-ssh.conf
Change two lines on the new file.
nano ipfw-ssh.conf
Content:
old:
actionban = ipfw add <blocktype> tcp from <ip> to <localhost> <port>
actionunban = ipfw delete `ipfw list | grep -i <ip> | awk '{print $1;}'`
new:
actionban = ipfw table 1 add <ip>
actionunban = ipfw table 1 delete <ip>
Done.
Now fail2ban is checking the ssh service for failed logins.
Next topic is about running an OpenVPN server.
1. Install openvpn
cd /usr/ports/security/openvpn && make install clean
mkdir /usr/local/etc/openvpn && /usr/local/etc/openvpn
2. Enable openvpn
echo 'openvpn_enable="YES"' >> /etc/rc.conf
echo 'openvpn_configfile="/usr/local/etc/openvpn/server.conf"' >> /etc/rc.conf
echo 'openvpn_if="tun"' >> /etc/rc.conf
3. Manage ssl certs with ssl-admin
cd /usr/ports/security/ssl-admin && make install
cp /usr/local/etc/ssl-admin/ssl-admin.conf.default /usr/local/etc/ssl-admin/ssl-admin.conf
nano /usr/local/etc/ssl-admin/ssl-admin.conf
And add the information missing (state, country, city, org, ...)
And start ssl-admin
ssl-admin
=====================================================
#                  SSL-ADMIN                        #
=====================================================
Please enter the menu option from the following list:
1) Update run-time options:
     Key Duration (days): 3650
     Current Serial #: 04
     Key Size (bits): 2048
     Intermediate CA Signing: NO
2) Create new Certificate Request
3) Sign a Certificate Request
4) Perform a one-step request/sign
5) Revoke a Certificate
6) Renew/Re-sign a past Certificate Request
7) View current Certificate Revokation List
8) View index information for certificate.
i) Generate a user config with in-line certifcates and keys.
z) Zip files for end user.
dh) Generate Diffie Hellman parameters.
CA) Create new Self-Signed CA certificate.
S) Create new Signed Server certificate.
q) Quit ssl-admin
3a) Create server cert
Press "S" and enter information
3b) Create client certs
Press "4" and enter information
Check all issued certs:
ls -al /usr/local/etc/ssl-admin/active
Copy certs to openssl directory
cd /usr/local/etc/ssl-admin/active && cp ca.crt server.crt server.key /usr/local/etc/openvpn && cd /usr/local/etc/openvpn
3c) Create dh:
openssl dhparam -out /usr/local/etc/openvpn/dh2048.pem 2048
4. Create openvpn configuration:
nano /usr/local/etc/openvpn/server.conf
Content:
daemon
port 4444
proto udp
dev tun
server [YOUR-OPENVPN-SUBNET] 255.255.255.0
ca /usr/local/etc/openvpn/ca.crt
cert /usr/local/etc/openvpn/server.crt
key /usr/local/etc/openvpn/server.key
dh /usr/local/etc/openvpn/dh2048.pem
client-to-client
duplicate-cn
keepalive 10 120
user nobody
group nogroup
persist-key
persist-tun
ifconfig-pool-persist ipp.txt
comp-lzo
client-to-client
max-clients 3
push "redirect-gateway def1 bypass-dhcp"
status /usr/local/etc/openvpn/openvpn-status.log
log-append /usr/local/etc/openvpn/openvpn.log
verb 4
5. Start openvpn
/usr/local/etc/rc.d/openvpn restart
Your OpenVPN server is running.
PS: I really like ssl-admin
That's it. A first look into the world of FreeBSD.
Hopefully I draw your interest. FreeBSD is woth it.
Next topic will be a ipv6 tunnel and how the jails can have access to it.
Last edited by a moderator:
